Texture and Material Settings for URP Efficiency
We have all been there: your Unity project looks incredible in the Editor, but the moment you build it to a target device or WebGL, the frame rate tanks. While it is tempting to blame the Universal Render Pipeline (URP) itself, the culprit is almost always a silent accumulation of unoptimized textures and heavy materials sucking up precious GPU bandwidth.
At bigfatgames.com, we live and breathe Unity optimization. We know that squeezing every drop of performance out of URP is not about a single magic toggle, but rather a series of deliberate, targeted adjustments. By auditing your project's texture import settings and streamlining how URP handles materials, you can dramatically reduce overdraw and memory pressure. For instance, according to Unity documentation, simply setting your Intermediate Texture to Auto in the Universal Renderer asset ensures that Unity only renders using an intermediate texture when necessary, which can significantly reduce GPU memory bandwidth.
Furthermore, small architectural oversights in your renderer settings can quietly destroy your mobile performance. Android Developers documentation highlights that disabling Depth and Opaque Textures eliminates extra texture copying that wastes GPU time, preventing unnecessary copy operations and GMEM loads. If you are targeting WebGL, Unity Discussions suggests specific optimizations such as setting Read/Write to false, Generate Mipmaps to false, Max size to 512 or lower, and Use Crunch Compression to true to keep your memory footprint lean. Additionally, as noted by Unity, transparent materials always use more GPU resources than rendering an opaque object due to overdraw, meaning developers should prefer opaque Unlit materials with half precision on mobile whenever possible.
Understanding these settings is the key to maintaining high visual fidelity without sacrificing target frame rates. Let us dive straight into the essential texture import configurations that will immediately lighten your build's GPU load.
- Set Intermediate Texture to Auto to limit unnecessary render target usage and lower GPU bandwidth.
- Disable Depth and Opaque Textures in your URP Asset to eliminate extra copy operations on mobile.
- Keep WebGL textures light by disabling Read/Write, disabling Mipmaps, capping Max Size at 512, and using Crunch Compression.
- Minimize overdraw by prioritizing opaque Unlit materials with half-precision over transparent shaders.
Streamlining the Universal Renderer Asset for Instant GPU Relief
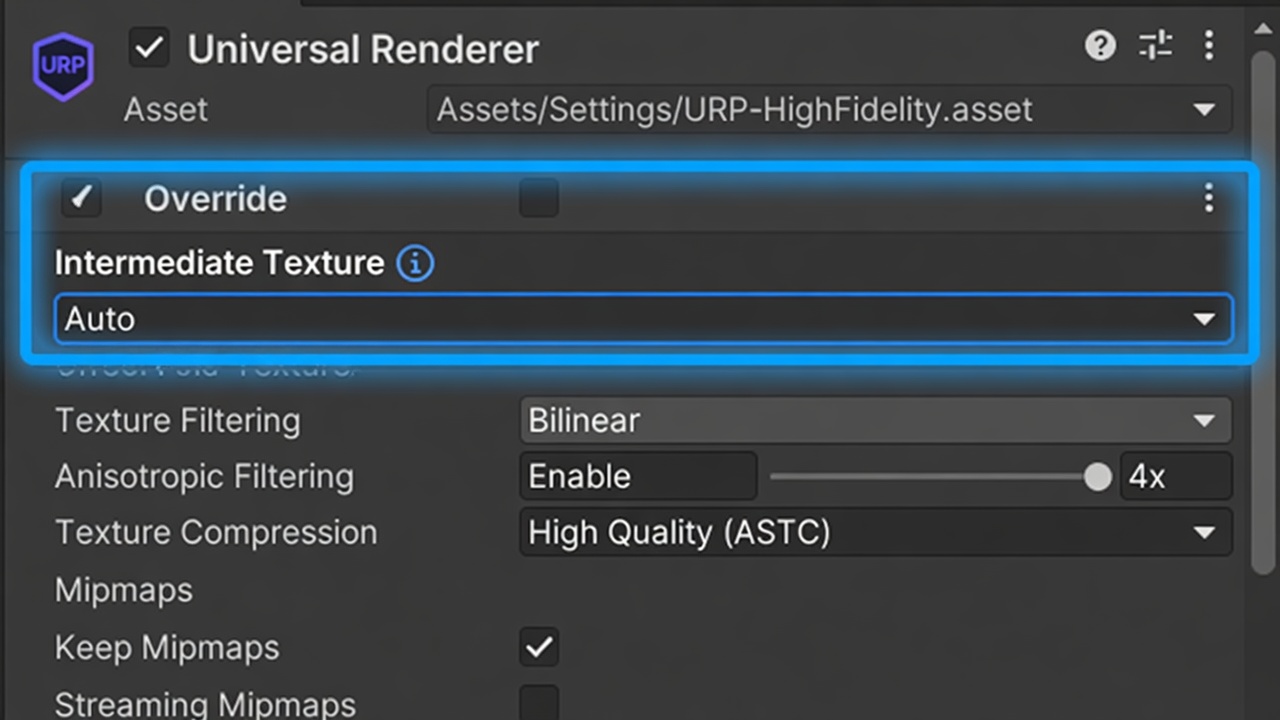
Before optimizing individual texture assets, we must look at the global pipeline configurations that govern how these textures are processed. The journey to a lighter GPU load begins directly within the Universal Renderer asset itself, where a single unoptimized configuration can force Unity to allocate costly render targets that quietly eat up your performance budget.
One of the quickest performance wins in this inspector is the Intermediate Texture option. By default, or if configured incorrectly, Unity may force rendering into an offscreen intermediate texture even when it is not strictly required. Setting the Intermediate Texture to Auto ensures that Unity only renders using an intermediate texture when absolutely necessary, which directly reduces unnecessary render target usage and lowers the GPU memory bandwidth URP consumes.
To truly appreciate these gains, you should measure bandwidth savings on your target hardware. By using platform-specific profiling tools—such as Xcode Instruments for iOS, Snapdragon Profiler for Android, or Unity's own Profile Analyzer—you can observe the drop in memory read and write cycles. When the GPU does not have to constantly swap render targets in and out of tile memory, thermal throttling decreases, battery life improves, and frame rates stabilize.
With your global intermediate texture behavior optimized, the next logical step in reclaiming memory bandwidth is auditing how your renderer handles auxiliary screen passes.
Taming the Depth and Opaque Texture Bottlenecks
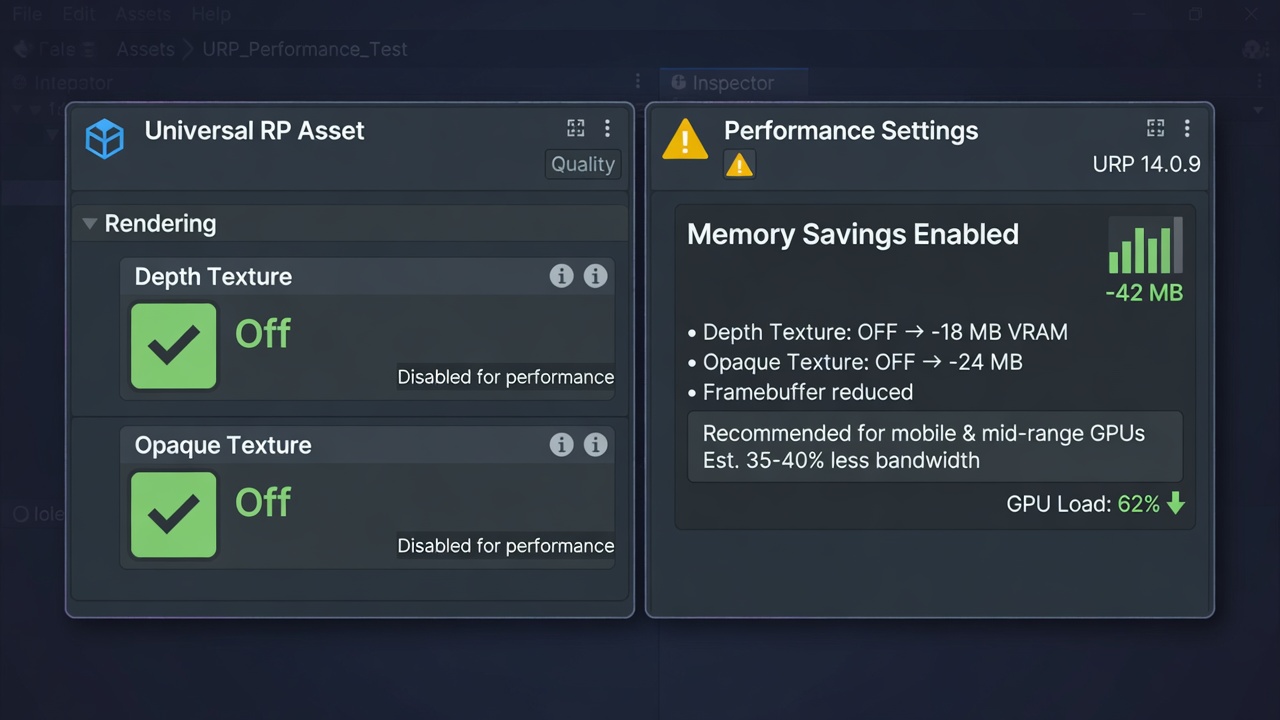
Specifically, we need to look at the Depth Texture and Opaque Texture toggles inside your URP Asset. By default, these options are tempting to leave enabled "just in case," but they come with a massive performance tax on your hardware.
Unless you have active shaders or screen-space effects—like depth-of-field, soft particles, or custom water refractions—that explicitly require these textures, you should disable both. Disabling depth and opaque textures eliminates extra texture copying that wastes GPU time, as these textures cause additional copy operations and GMEM loads that reduce performance.
- Audit your materials: Only enable these settings if a specific shader or post-processing effect actively reads from
_CameraDepthTextureor_CameraOpaqueTexture. - Use per-camera overrides: If only a single level or cutscene requires depth data, disable it globally in the URP Asset and enable it only on the specific cameras that need it.
With your pipeline assets streamlined to prevent unnecessary copy passes, the next critical area of waste lies directly within the texture assets themselves.
Auditing Texture Import Settings: The Quickest Wins for VRAM
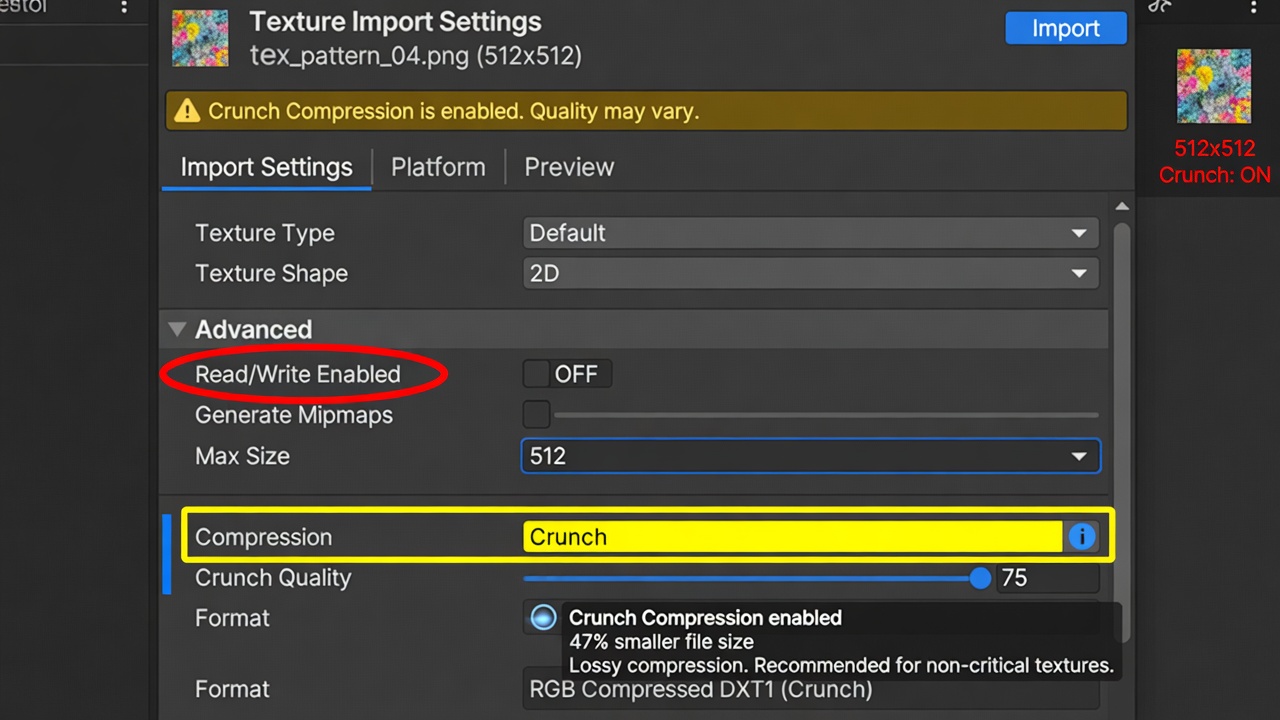
Every texture imported into Unity defaults to settings that might not fit your actual runtime needs. The first rule of texture optimization is keeping your VRAM footprint as lean as possible. Unless you are dynamically modifying pixel data on the CPU at runtime, you should immediately uncheck Read/Write. Leaving this active duplicates the texture data in both system RAM and VRAM, instantly doubling its memory footprint.
Mipmapping and Resolution Limits
Similarly, while mipmaps are essential for 3D environments to prevent aliasing, they are a complete waste of memory for 2D UI elements, HUDs, or screen-space effects. When optimizing for constrained platforms like WebGL, strict texture limits are vital for fast load times and low memory footprints. For these environments, recommended settings include setting Read/Write to false, setting Generate Mipmaps to false, capping the Max Size to 512 or lower, and enabling Crunch Compression to drastically shrink your final build size.
- Cap Max Size: Don't default to 2048x2048. Many UI elements and small prop textures look identical at 512 or lower, saving massive amounts of bandwidth.
- Use Platform-Native Formats: Ensure you are using ASTC for mobile or BC7 for desktop, and leverage Crunch compression where supported to reduce download sizes.
Once your texture assets are tightly packed and compressed, the next step in maximizing URP efficiency is controlling how those textures are drawn onto your geometry.
Smart Shader and Material Choices: Defeating Overdraw and Boosting Batching
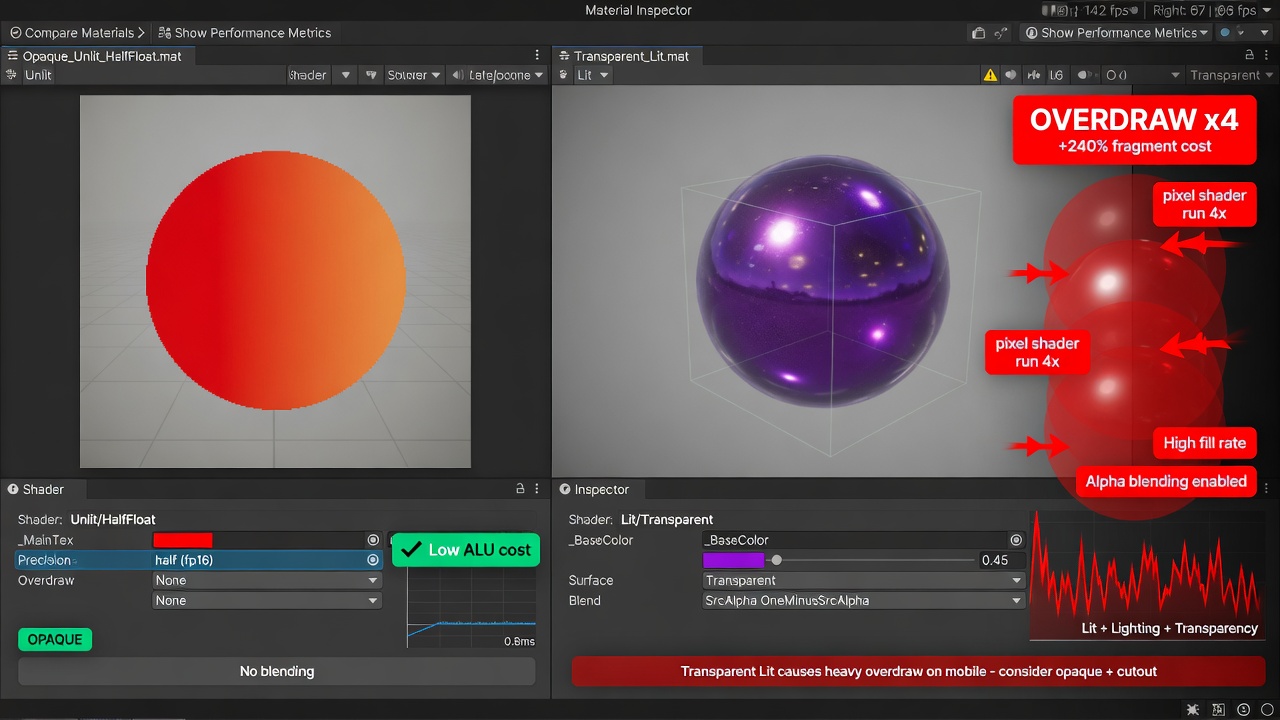
This is where smart shader and material configurations make or break your rendering pipeline.
To keep your GPU from choking under heavy fill-rate demands, prioritize opaque materials over transparent ones. Rendering an object with transparency always uses more GPU resources than rendering an opaque object. If you are targeting mobile or standalone VR, consider using Unlit Opaque materials with half precision, when possible, to keep math operations lightweight and eliminate performance-sapping overdraw.
Maximizing the SRP Batcher
Equally important is how you organize these materials to minimize draw calls. The SRP Batcher is your best tool for this, but it requires a disciplined approach to shader management:
- Keep materials on the same shader: The SRP Batcher can batch draw calls even if materials use completely unique texture inputs, as long as they share the same shader variant.
- Stick to URP-specific shaders: Rely on the built-in Lit, Unlit, and Particle shaders instead of building custom, heavy Shader Graph networks for basic assets.
- Limit math complexity: Avoid expensive node operations on mobile and WebGL targets to keep fragment shader execution times low.
By pairing strict texture import rules with optimized, batch-friendly shaders, you ensure your URP project runs cool and fast across all target hardware.
Key Takeaways
Explore the optimization tools and resources at bigfatgames.com to streamline your Unity URP project's performance today.